Monday, January 7, 2019

Mom’s Beard Oil

OK, so my son asked me for beard oil for Christmas last month and had a specific product line he usually bought from. I looked high and low and finally came to the conclusion that they no longer made it in the specific scent that he requested. So, I went on a mission to make him my own version. It’s safe, all natural and with essential oils. He LOVED it! I decided to make a batch so I had enough to give to my husband and my daughters boyfriend too. The one thing they loved was that it was made with Sandalwood and that the oil not only smelled great but also made their skin and beard hair soft!
I thought it would be funny to call it “Mom’s Beard” oil! 🤣


It was SUPER easy to make, but the Sandalwood EO can be expensive. I didn’t mind since it was Christmas!  You may want to play around with other scents that can lend themselves to manly cologne type smells. Woodsy types like Idaho Blue Spruce, Northern Black Spruce, Cedarwood, Evergreen are a few options and there are so many others! Blend those woodsy spells with lime or citrus smells to round it off. Play around in small increments before making larger gift size bottles! Here is the recipe I used for the “Mom’s Beard Oil”. Did I mention how EASY this was?! I think it took me longer to make the labels. Even that wasn’t too bad with Avery! (Round labels # 22807 and designed and printed on line at app.print.avery.com.)

BEARD OIL recipe
1 TBS Shea Butter
1/3 cup Sweet Almond oil
1/3 cup Jahoba oil OR V6 oil from Young Living
2 tsp glycerin
1/4 tsp vitamin 3 oil (optional)

Essential oils I used (but you can play around with the ratio’s.
30 drops Lime EO
10 drops black Pepper EO
1/2 tsp Sandalwood EO

Directions: the only oil that needs to melt is the shea butter. Put that and a little bit of the Almond oil in a small cup in the microwave (or double boiler) just until it’s melted. I did mine in the microwave for 5-10 second increments. Once it easily blends with the almond oil you can add the rest of the ingredients. Once the first ingredients are all blended well, add your Essential Oils. (Remember that EO’s should not be added while things are hot, as this will destroy the health benefits EO’s have in the cooled state.) 

This recipe yielded 3) two ounce bottles. (I used a pump style bottle) My son says the one he used to buy was half the size and thinks this one should last 9 months to a year! It only take a few drops and goes a long way! Have fun! I know Fathers Day is half a year away, but this would make for a great Fathers Day gift...or even a Birthday gift for the man in your life!

Tuesday, January 24, 2017

All natural DEODORANT with essential oils

 Here is a really EASY, peasy recipe you can make in 5 minute! With all the concern about aluminum in store bought products, it makes sense to DIY this awesome recipe!


Summertime, Melt-Free Deodorant (MY FAVORITE for year round)
The addition of beeswax in this recipe will keep the deodorant from melting so you won’t need to keep it refrigerated.
½ cup of coconut oil
1 tablespoon of beeswax pellets or shaved beeswax (I did 3 TB to make it firmer)
¼ cup baking soda
¼ cup cornstarch or arrowroot powder 
(I added 1/4 c arrowroot too)
10 drops Lavender or other essential oil (I did 15-20 drops)
(With all my adjustments it made 3 deodorants)

1. Warm the coconut oil and the beeswax in the microwave (using ten-second intervals) or in the top of a double boiler until the coconut oil melts and beeswax is very soft. Stir the mixture until the beeswax melts.
2. Stir in the baking soda and the cornstarch and/or arrowroot powder.
3. Making sure the mixture is not too warm, add the essential oil.
4. Now pour the mixture into a recycled deodorant dispenser (I bought new ones on Amazon!) for easy application or into a lidded jar to apply by hand.


Deodorant for Sensitive Skin
 cup unrefined coconut oil
 cup cornstarch or arrowroot powder
1½ to 2 tablespoons of baking soda (adjust for sensitivity)
10 drops Lavender or other essential oil

1. Warm the coconut oil in the microwave (using ten-second intervals) or in the top of a double boiler just until it melts. Heating coconut oil this way will not destroy the Medium Chain Fatty Acids (MCFA) that make it antimicrobial, but you can skip this stepit will just make blending and pouring a little harder.
2. Stir in cornstarch or arrowroot powder and the baking soda.
3. Making sure the mixture is not too warm, add the essential oil.
4. Now pour the mixture into a recycled deodorant dispenser (or ones you can purchase on Amazon) for easy application or into a lidded jar to apply by hand.Keep in refrigerator during warmer weather.


Sunday, January 1, 2017

DIY- Diffused Jewelry - for EO's

We did a special Make and Take class a couple of months ago. As you can see, with guidance from a fellow artist and jewelry maker, we ended up with some beautiful pieces! Thanks Rolland Rousselle for your talent and help! For those who want to join us for future classes, join my mailing to get notified of where and when: FILL OUT THIS FORM:


First Name:
Last Name:
Email Address:
Phone Number:
Address Line 1:
City:
State:
Zip:
Country:
Yes! Please add me to your mailing list today!

Hand Sanitizer- all natural with essential oils!

Hand Sanitizer -DIY natural recipe
Arm yourself with a softly-scented natural version of hand sanitizer using this recipe


Ingredients
5-10 drops tea tree essential oil 
30 drops lavender essential oil – this is a 0.5% concentration  
1 Tablespoon witch hazel extract or high-proof vodka  (I used vodka)
8 ounces 100% pure aloe vera gel  
¼ teaspoon Vitamin E – a natural preservative to increase shelf life (It will also help soften hands!)

Method

Add essential oils and Vitamin E oil to a small glass bowl or container and swirl to mix. Add witch hazel (or alcohol) to the oils and swirl again. Combine this mixture with the aloe vera gel and mix well. Shake gently before each use. (Sanitizer should last several months with the addition of Vitamin E and alcohol to help preserve.)

I am not a fan of commercial hand sanitizers that contain drying alcohol and often contain triclosan and antibacterial ingredients that may contribute to resistant strains of bacteria. (this will link to a fellow blogger who has done some research in this area!)

Saturday, December 31, 2016

Soft Scrub-DIY all natural

Making your own soft scrub is so quick and easy! It only takes 4 ingredients and 1 minute to make!

RECIPE:
1/2 cup baking soda
5-6 TBS Castile soap

1 cap Thieves household cleaner (Young Living)
4-6 drops Lemon Essential Oil (Young Living)
Mix together and store in a glass jar. That's it!!


In case you can't see the attached video click on this link: https://youtu.be/id5nN2Th7Xk

Tuesday, October 18, 2016

TIPS for using Essential Oils in cooking!


Sugar Scrub

Here's a wonderful body scrub. This is helpful for exfoliating dry, dead skin on your legs, elbow's, heals etc... I used it today and man, it worked awesome!
I made a FB video of this and the Baked Feta recipe. I posted it on YouTube if you want to see it, CLICK HERE!


Baked Feta with Tomatoes

We made a video of this one! You can see it on YouTube HERE. This was a fun Make & Take project to learn about the Vitality oils and how you can use essential oils in your cooking! Holidays are coming and this is an easy one to throw together and look like you are a gourmet cook...LOL


BODY BUTTER- Made Simple

One thing I've learned about Body Butter is that there are many options for ingredients. It's all about the ratio of the butters vs the oils. Here is yet another option you can make and one I really liked too! Mostly because of the simple ingredients. I did this one because a friend was allergic to nut butters and oils. So this one I chose to use Shea butter, Mango butter, Coconut oil and Jajoba oil.


How to Make Body Butter
This new recipe has similar ingredients to the lotion bars, but removes the beeswax and whips the mixture as it cools to create a cloud-like lotion that is extremely nourishing! This Body Butter is great for babies or sensitive skin, and scents can be added to make it a custom gift for anyone (or to keep for yourself!).
The combination of shea and cocoa butter with two nourishing oils makes a highly moisturizing combination, but whipping the mix helps it go on smoothly without being oily.
My current favorite is a peppermint scented version for the holidays, but I also like a citrus/lavender combination.
Body Butter Ingredients
  • 1/2 cup Shea Butter
  • 1/2 cup Cocoa Butter or Mango Butter
  • 1/2 cup Coconut Oil
  • 1/2 cup light oil (like almond, jajoba or olive)
  • Optional: 10-30 drops of essential oils of choice (I use Lavender and Citrus from YOUNG LIVING)
  • 1-2TB Arrow root (optional) helps to be less greasy feeling.
Body Butter Instructions
  1. In a double boiler or glass bowl, combine all ingredients except essential oils.
  2. Bring to medium heat and stir constantly until all ingredients are melted.
  3. Remove from heat and let cool slightly.
  4. Move to fridge and let cool another 1 hour or until starting to harden but still somewhat soft.
  5. Use a hand mixer to whip for 10 minutes until fluffy, adding desired EO's.
  6. Return to fridge for 10-15 minutes to set.
  7. Store in a glass jar with a lid and use as you would regular lotion or body butter. If your home stays above 75 degrees, it may soften and need to be kept at the fridge, but it will stay whipped at a temperature lower than that.
  8. Enjoy!

AN EVEN EASIER VERSION: 
Using all the same steps as above I tried this easy 2 ingredient version (not including EO).
  •  12 oz Shea Butter (1 1/2 cups)
  •  3 oz Coconut Oil (1/3 cup)
  • 1/8 tsp (about 8-10 drops)Essential Oils (EO) of your choice

Best Whipped Body Butter

Here is a wonderful Whipped Body Butter we made with our group for the first time.
Someone was allergic to nut butters, so I made it again and loved it just as much if not more!!!
I called it "Body Butter-Nut Free" (see another post!)

This BEST WHIPPED BODY BUTTER whipped up nice but got very stiff after a few days. Some people didn't mind it, but I preferred it to stay soft and liked the Nut Free version a little better for that. Otherwise, this felt AWESOME on my skin!

This is just before it got whipped....(sorry I forgot to take a picture afterwards...But it looked like cool whip!)

BEST WHIPPED BODY BUTTER


1/2 cup mango butter   
1/4 cup shea butter   
1/4 cup kokum butter  
1/4 cup cocoa butter   
1/4 cup coconut oil (the kind that’s solid at temperatures below 76 degrees)  (you probably already have coconut oil in your pantry, but if not, it can be found in any grocery store)
1/4 cup sweet almond oil   
1 Tbsp arrowroot powder  (you can find this at most grocery stores in the spice aisle)
up to 30 drops of essential oil (optional)...I use Lavendar and Sandalwood!


An Overview of How to Make Whipped Body Butter
Soft & silky whipped body butter is very easy to make.  Below I’ve given you step-by-step instructions of what to do  but here’s an overview of the 5 simple steps to making whipped body butter.
  1. measure out your butters and oils into a heat-safe glass bowl or measuring cup (or you can use a kitchen scale)
  2. melt your butter and oils
  3. whisk in your  arrowroot powder
  4. freeze for 20-30 minutes OR refrigerate for a couple of hours
  5. Add your Essential Oils and whip until soft and fluffy (about 5 minutes)
Step-by-Step Instructions
Just exactly how do you make whipped body butter with essential oils?

 1)  Measure out the following ingredients into a glass bowl or Pyrex measuring cup (this will be the top of your double boiler)

2)  melt your butter and oils
I use the double boiler method to do this, but you could also use a microwave if you’d like.
For the double boiler method, fill a saucepan with a couple inches of water and then place your heat-safe glass bowl or measuring cup (Pyrex works great!)  inside the pot.  Set your stovetop heat to medium and stir constantly.  Usually only takes a few minutes, but make sure everything is completely melted before you move on to the next step.
Microwaving is very similar. Use 50% power and make sure you take it out to stir every 30 seconds.

3)  whisk in 1 tablespoon arrowroot powder, making sure everything is blended and there are no lumps

4)  freeze for 20-30 minutes or refrigerate for 1-2 hours
You want the mixture to start to solidify but not completely harden, a consistency similar to soft wax or softened butter.  It should cool to a temperature of 55-65 degrees.
tip:  no room in the freezer or refrigerator?  In the winter, try covering the mixture and setting it outside to cool.

5)  transfer to a large bowl and whip until soft and fluffy and add your Essential Oils(about 5 minutes)
whip with mixer until stiff enough to hold its shape.
tip:  you’ll need to use a power mixer for this (unless you have super hero arm strength), but either a hand mixer or a stand mixer (like the one in the photo below) will work.
tip:  if you forgot about you mixture and it stayed in the fridge/freezer/backyard for too long, no problem.  Just let your mixture sit at room temperature for 20-30 minutes until it’s about 55-65 degrees and the consistency of soft butter, then you’re ready to start whipping.
tip:  If you are having trouble getting it to whip up, you might have to blend a bit and put back in fridge for 20 minutes or so to get cold enough again to get stiff enough.   If the mixture won’t whip or stay whipped, you need to chill it longer.
tip:  If the mixture has lumps in it after you’ve whipped it, let it set to soften a bit and then try again.
tip:  one signal that your whipped body butter is on the right path is that it will change color from  yellow to pale yellow to white (see the photos below)
when you’re done, your whipped body butter should be like this…
white
stand on its own (see how it stays up in peaks on the beater)
light, fluffy, soft, and silky texture


Why Use Those Ingredients?
mango butter
  smooth and creamy (lighter consistency than even shea butter)
  • very moisturing and soothing for the skin– great natural source of fatty acids
  • light, subtle scent
  • solid at room temperature, but melts at 87-90 degrees, so when you apply it to your skin it melts and absorbs in (exactly what you want in a body butter)

shea butter
  • soft, smooth, and creamy
  • high in vitamins A and E as well as essential fatty acids
  • intense moisturizer for dry skin
  • note:  unrefined shea is best, but be careful of which brand you buy.  Many brands of shea butter can have a strong unpleasant smell.  click here for the shea butter I buy.  It’s creamy, moisturizing, and has a nice, subtle scent.  Other brands of shea butter can have a strong, kind of “funny” smell, not this one.  If you’re not a fan of other shea butters, give this one a try.  I think you’ll love it!  I do.

kokum butter
  • unlike shea and mango butter, kokum is a hard and flaky.  It’s a dryer butter, meaning it absorbs more quickly into your skin and leaves a dryer, less greasy feeling
  • loaded with fatty acids and antioxidants
  • supports skins elasticity

cocoa butter
  • like kokum butter, cocoa butter is also a hard, brittle butter that adds a rich and creamy texture to this whipped body butter
  • emollient and moisturizing
  • velvety texture on skin
  • delicious cocoa aroma (keep its heavenly chocolate scent in mind when choosing which essential oils to add to your whipped body butter)

coconut oil (solid kind that melts at 76 degrees)
  • light oil — so it helps make a light and fluffy whipped body butter
  • sinks in quickly to the skin
  • but coconut oil is not the best at moisturizing– so I’ve combined it with the other butters and oils in this recipe to create a light, soft, silky, less greasy, AMAZING whipped body butter

sweet almond oil
  • one of the gentlest oils
  • extremely nourishing, rich in Vitamin D
  • excellent emollient known for its ability to soften and recondition the skin

arrowroot powder

  • helps to cut down on the greasy feel of the body butter
  • adds to the silky texture

Tuesday, August 9, 2016

Lip Balm -DIY

OK....pucker up those lips! Time to make EASY lip balms for smooth luscious lips!
I can't believe how easy these are and don't know why it's taken me this long to discover it! But here it is! Basically there are 3 main ingredients, then you add your essential oils for flavor and all natural benefits! 

WHAT YOU NEED:

1 part beeswax pellets
2 parts shea butter
2 parts coconut oil
20 drops essential oil of choice
containers to put it in...small tin type or tubes (I found mine on Amazon)

DIY Lip Balm Instructions
  1. Put about an inch of water in the bottom of a small pan and turn on medium heat.
  2. Place a small (pint size or smaller) jar in the water, being careful not to get in water inside the jar.
  3. Place all ingredients except the essential oils inside the glass jar and slowly melt, making sure not to get any water in jar. I use 2 tablespoons each of the butter(s) and coconut oil and 1 tablespoons of beeswax. This fills about 18 tubes.
  4. When all ingredients are melted, stir well and turn off heat, but leave jar in the water to keep warm.
  5. Stir in the essential oils.
  6. Use a glass dropper to quickly fill the containers. I leave the jar in the water but turn off the heat to keep the ingredients liquid while I do this.
  7. The mixture will settle slightly as it cools, so I also re-top the containers after about 2 minutes as they start to harden.
  8. Let sit without touching for several hours or until completely hardened.
  9. Store in a cool dry place (they will last for at least a year if stored correctly).
  10. Enjoy!
Note: This will make a medium firm lip balm. If you prefer a firmer and longer lasting lip balm, you can add more beeswax, up to double the recommended amount. If you prefer a smoother and more oily lip balm, you can reduce the amount of beeswax. ENJOY!!!


Here's the final product!
I made this one as a "Creamsicle" using a touch of Vanilla Oleoresin and Orange essential oil. I've seen on different websites that you shouldn't use any water based stuff because it will separate. I used this vanilla paste because there isn't much water content.(You should NOT use vanilla extract for this reason). The paste can be expensive, but I already had it on hand from a previous project....and it lasts a long time!

YUMMY! My first lip balm was a huge success!


Bug repellent spray-all natural!

                        Making an all natural bug repellent is SOOO easy and actually smalls pretty good! I really don't like the chemicals used in the over the counter sprays. I found this awesome recipe and tweaked it a bit. Spray it on generously for best results!

INGREDIENTS:

  • Essential oils: choose from Citronella, Clove, Lemongrass, Rosemary, Tea Tree, Cajeput, Eucalyptus, Cedar, Catnip, Lavender, Mint
  • Natural Witch Hazel
  • Distilled or boiled Water
  • Vegetable glycerin (optional) 
  • 8 oz Spray bottle (or larger)

How to Make Homemade Bug Spray
  1. Fill spray bottle (I used 8 ounce) 1/2 full with distilled or boiled water
  2. Add witch hazel to fill almost to the top
  3. Add 1/2 tsp vegetable glycerin if using
  4. Add 30-50 drops of essential oils to desired scent. The more oils you use, the stronger the spray will be. My personal favorite mix is: Lemongrass, Lavender, Cedar and Eucalyptus… it works great and smells good too!


Saturday, May 28, 2016

Natural Baby Wipes

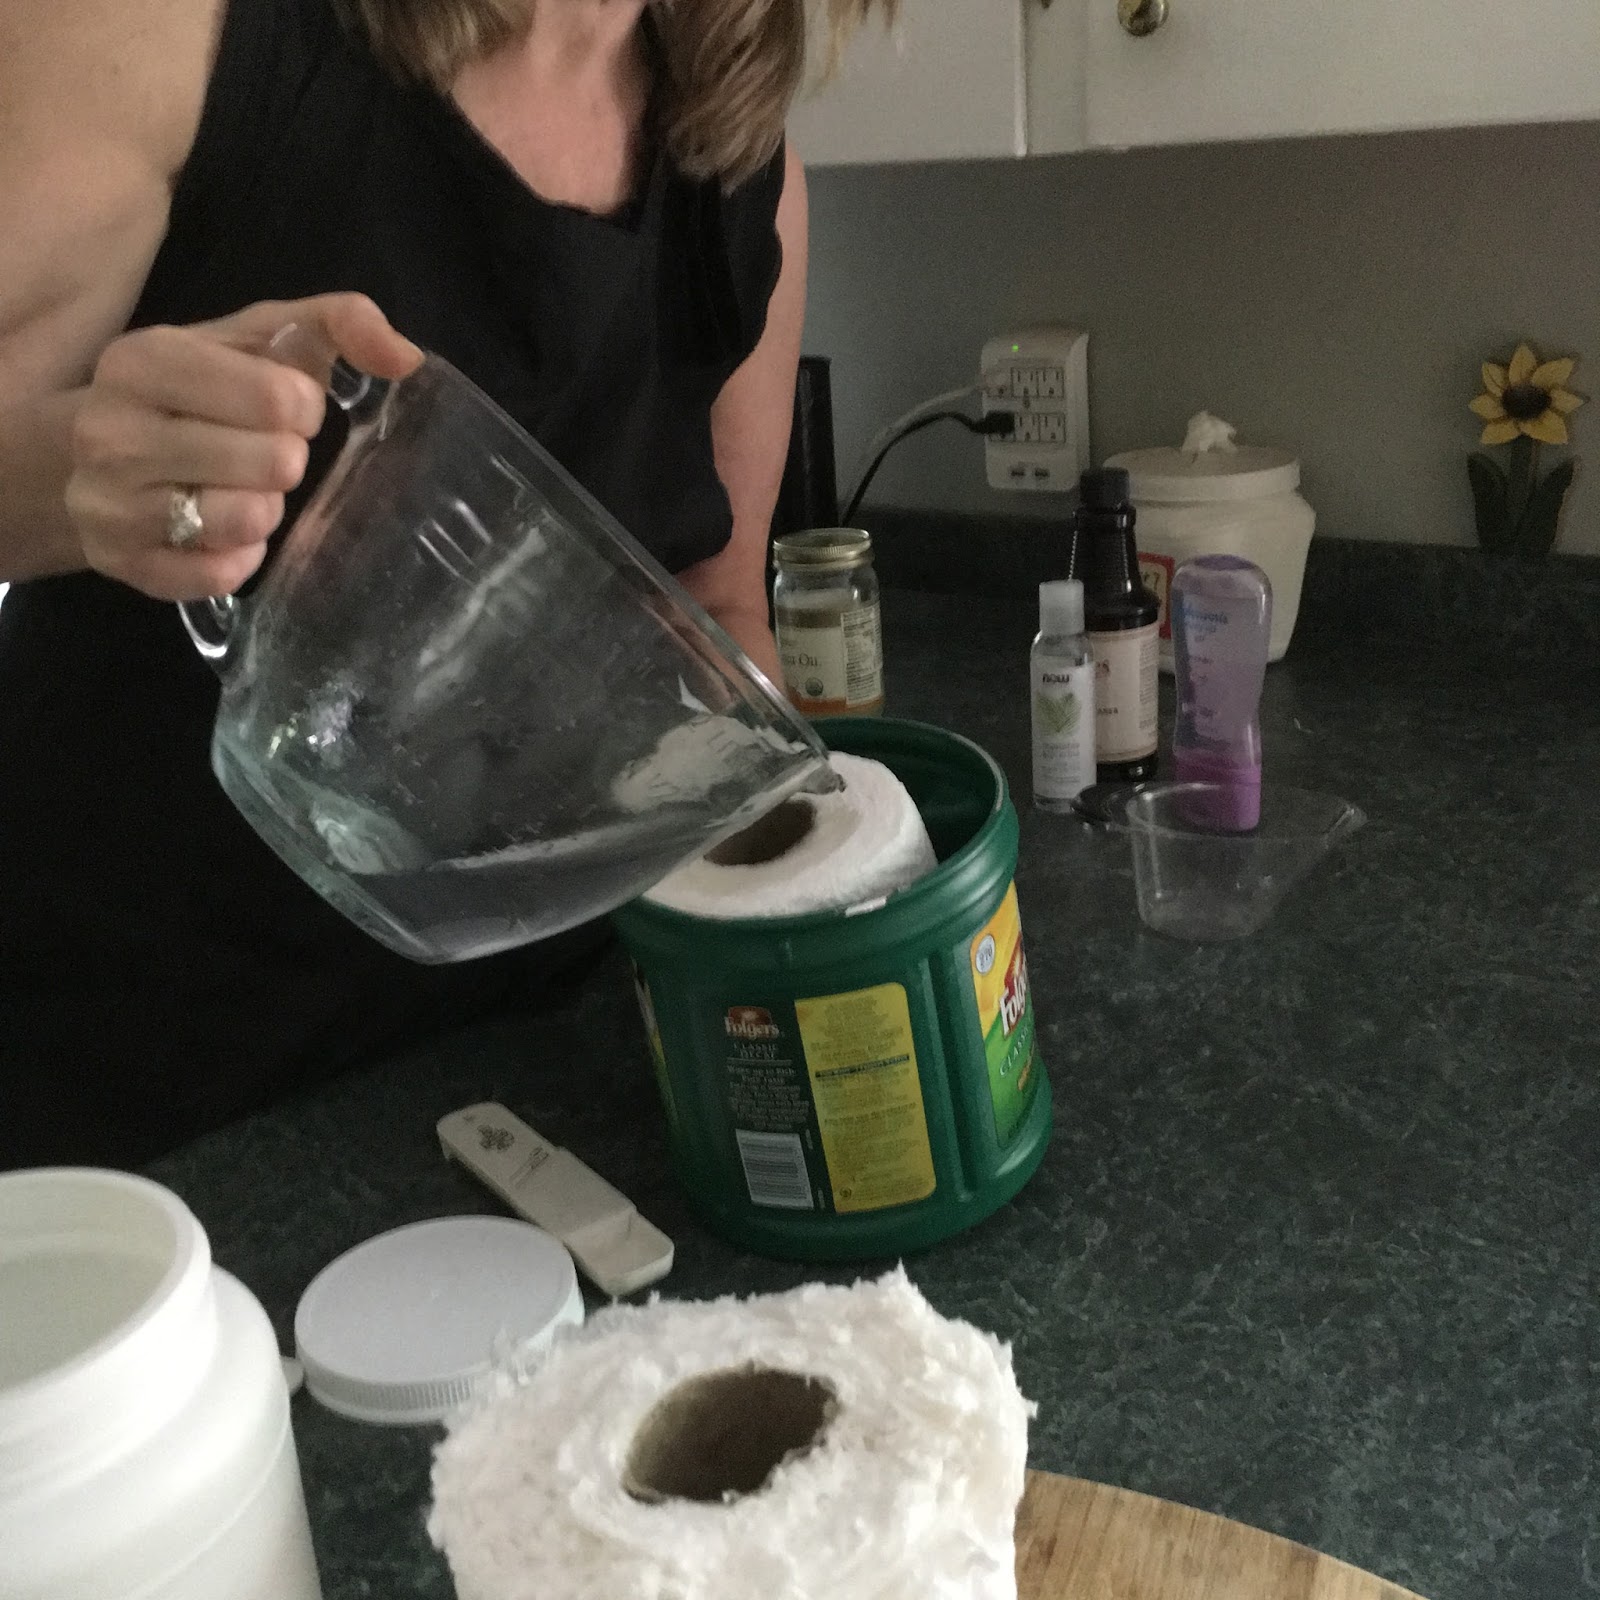
Using an empty coffee can OR any plastic container with a lid that will fit half a paper towel roll will work for this project! I adjusted the ingredients with what I had on hand. Cost per large container of Baby wipes is under $1 each! Can't beat that!

Things you will need:

  • 2 cups distilled water
  • 1 TB coconut oil 
  • 1 tsp vegetable glycerine
  • 1 tsp baby oil (or carrier oil of your choice)
  • 8-10 drops lavender essential oil
  • empty container-I used an empty protein container or coffee can with lid (spray painted the day before...if desired)
  • Strong roll of paper towels


I used this white container because I didn't have to spray paint it. Mix all the liquids together. If the coconut oil is solid then heat up altogether in pan OR microwave for about 30 seconds or until coconut oil is melted.

Cut paper towel in half with a sharp, smooth, non-serrated knife.
Place paper towel half into the plastic container. Pour mixture over the paper towels.


 Pour mixture over the paper towels and wait 5 minutes.
Then pull the center roll out. It comes out VERY easily.

 
After taking the center roll out I took the roll out of the container and squeezed it a little to make it go into the narrower white one. Worked like a charm!

Tuesday, May 24, 2016

Kitchen and Bathroom cleaning wipes

Kitchen and Bathroom cleaning wipes


I got this idea on FaceBook! It looked super easy and cost effective AND with all natural ingredients, which are all down my alley! This project without spray painting the can took all of 15 minutes to make...and most of that time was used to cut the paper towel roll in half. So, if you work out and have muscles, this could actually take 10 minutes!

What you need:


  • ¼ cup vinegar 
  • cup distilled water 
  • 1 Tbs or capful of Thieves household cleaner  (or natural dish soap) 
  • 1 tsp Vegetable Glycerine
  • 8-10 drops citrus essential oil (lemon, citrus fresh or orange: your choice)
  • strong Paper towel roll
  • Bread knife
  • Mixing bowl
  • Empty coffee can or Tupperware container


 If you want, the day before, you can spray paint your coffee can like I did below.


Instructions:

Cut a roll of paper towels in half, or to the height of your container, with a bread knife. (Use the other half as a replacement roll.) 
Combine the vinegar, water, Thieves household cleaner or dish soap, and essential oil in a mixing bowl, and stir well. 
Cut an X into the lid of your empty coffee can. Spray-paint the color of your choice, (optional), and let dry for at least few hours. 
Slide the half roll into the can, and cover in the liquid. Let it soak in thoroughly before removing the cardboard roll in the center (about 5 minutes). Pull the center up and push it through the X slit in the lid. Snap on the lid and pull the first wipe out. 
Enjoy your nontoxic cleaning wipes!

Body Bar -for moisture OR pain relief

2 kinds of Body Bars - for moisturizing OR pain relief


As you can see the ingredients needed for a moisture bar is similar to what is needed for a pain relief bar. So, that's why we tackled both in the same session. I made several of each kind so they will last me a while or I can gift some to those who need them.

Moisture Bar Ingredients

  •  1 cup coconut oil
  • 1 cup shea butter, cocoa butter or mango butter (or a mix of all three)
  • 1 cup beeswax
  • Optional: 1 teaspoon Vitamin E oil
  • Essential oil of your choice-10-20 drops

Moisture Bar Instructions

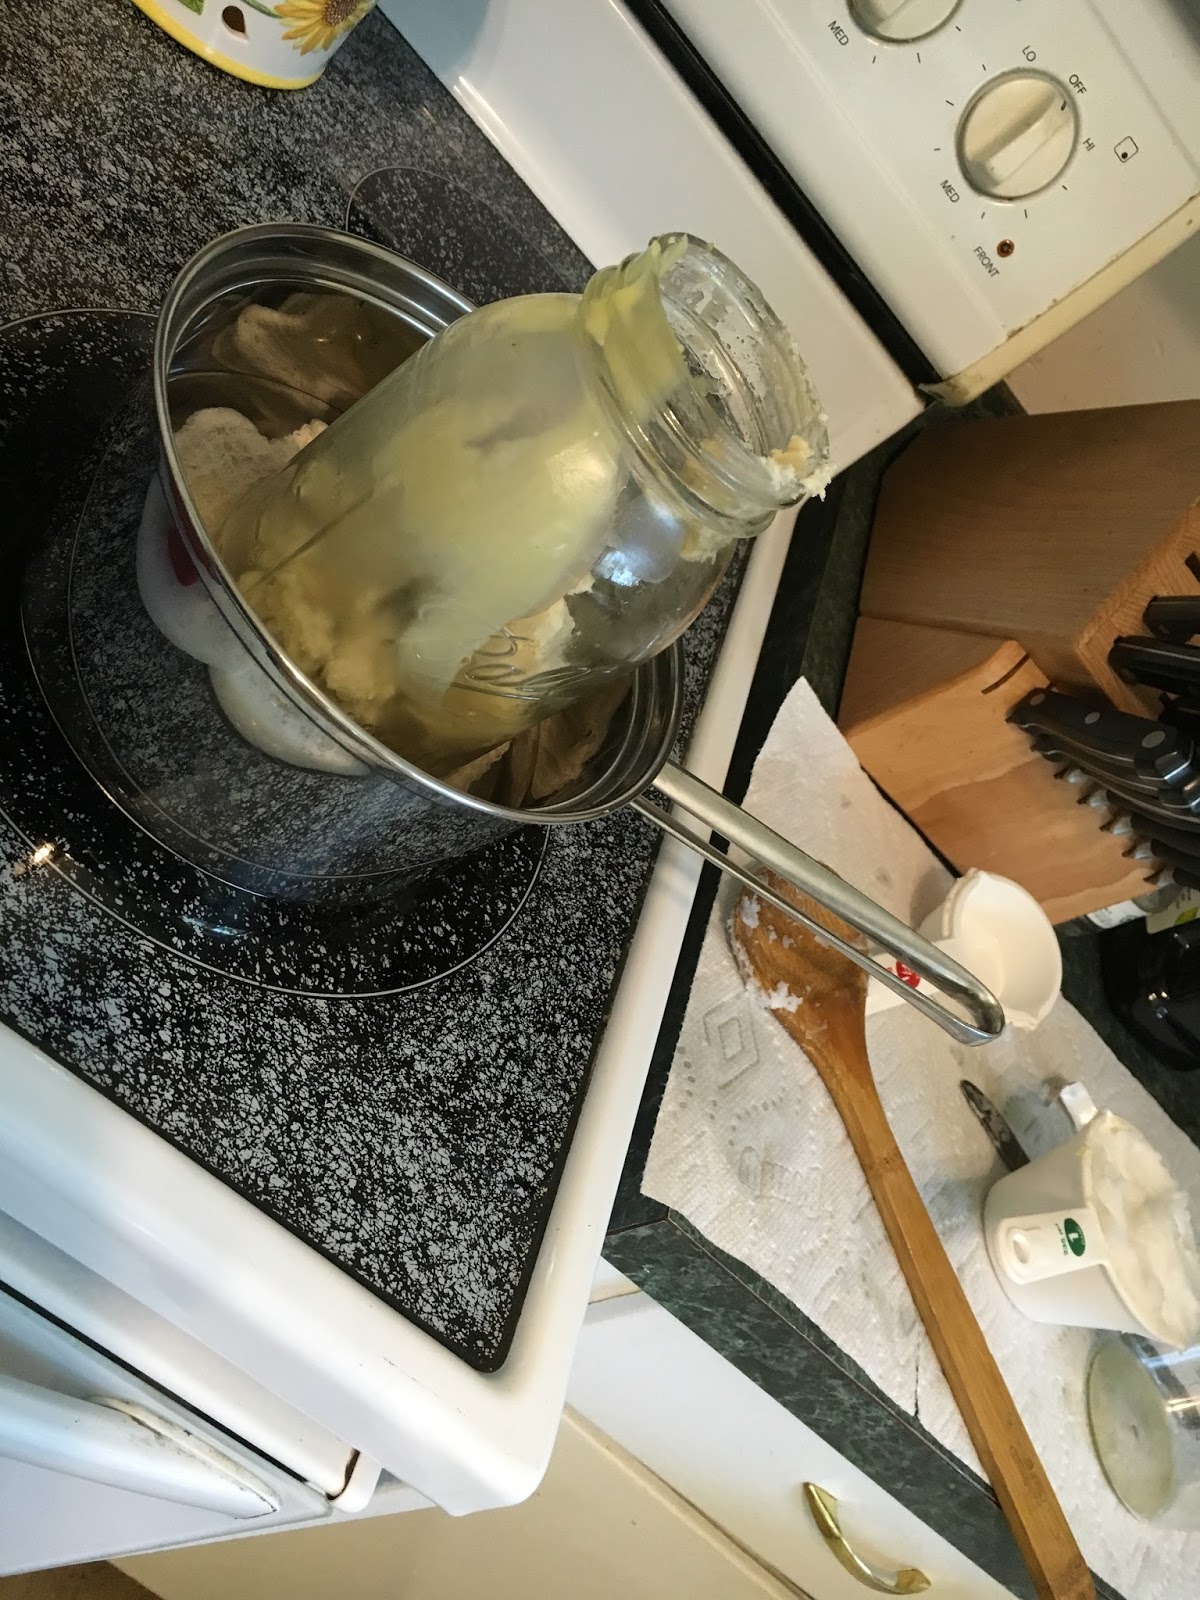
  1. Combine all ingredients (except essential oils if using) in a double boiler, or a glass bowl over a smaller saucepan with 1 inch of water in it. UPDATE: Combine in a quart size glass mason jar with a lid instead and place this in a small saucepan of water until melted. This will save your bowl and you can just designate this jar for these type of projects and not even need to wash it out…
  2. Turn the burner on and bring water to a boil. Stir ingredients constantly until they are melted and smooth:
  3. Remove from heat and add the essential oils.
  4. Gently stir by hand until essential oils are incorporated.
  5. Carefully pour into molds or whatever you will be allowing the lotion bars to harden in. I used these silicone baking cups, though any mold would work.
  6. Allow the lotion bars to cool completely before attempting to pop out of molds. These could be made in different shaped molds for different holiday gifts (hearts for valentines, flowers for Mother’s day, etc.) or made in a square baking pan and then cut into actual bars.
Note: This recipe can be adjusted to make any quantity that you’d like. I made with equal 1 cup measurements. The recipe I used made exactly 12 lotion bars with my molds. For a small batch, this recipe could be cut in half or even one fourth.


Pain Relief Bar ingredients:

(These smell excellent and work wonders on sore or tired muscles!)

  • 1/3 cup coconut oil
  • 1/3 cup shea butter, cocoa butter or mango butter
  • 1/3 cup beeswax
  • 1 tablespoon Menthol Crystals
  • 10 drops Peppermint Essential Oil + 10 drops of Panaway Essential Oil
  • 1/2 teaspoon Arnica Oil (optional)

Pain Relief bar/stick instructions:


  1. Combine all ingredients in a quart size glass mason jar and carefully place this jar in a small saucepan of water on the stove.
  2. Turn the burner on and bring water to a low simmer. Stir ingredients constantly until they are melted and smooth.
  3. Remove from heat and stir in the menthol crystals and stir until dissolved.
  4. Add essential oils and arnica oil (optional) and stir until mixed.
  5. Carefully pour into molds or whatever you will be allowing the lotion bars to harden in. I used these empty deodorant containers (I got on Amazon), though any mold would work.
  6. Allow the lotion bars to cool completely before attempting to pop out of molds. These could be made in different shaped molds or made in a square baking pan and then cut into actual bars.


Friday, February 19, 2016

Face moisturizer

Once a month I have a meeting to make different things with the essential oils! Here we are in my living room making this awesome face moisturizer. It's been a cold and dry winter. Who couldn't use a little moisturizer....like everywhere! But we focused tonight on the face! But you could use this all over!!! But it is especially wrinkle free with Frankenscence essential oils added along with the wonderful benefit of Rosehips! ENJOY!


Here is the recipe:
You simply just mix everything in a glass bottle and then you're ready to go. Seriously, it's that easy! 


Monday, December 21, 2015


We are a division of the Super Cooper team. Kathy Cooper is the one in the funky glasses! As you can see, she is all about making this journey FUN! I'm the one on her right. We are all moving forward with Kathy as our fearless leader! Above are Cheryle, Barbara and Greg, Michelle and Penny,  Chris and Terri. Together, with the rest of our team, we will help our friends and families live healthier lives as we share what Essential Oils can do for them! One drop at a time!

To learn more about Young Living essential oils and why we have chosen them, click HERE.
If you are interested in classes (Northern Mass area) on how to use essential oils for you OR your 4 legged friends go HERE. Be sure to sign up for our emails here on this blog. We will be having video tutorials soon! (so you don't have to be local!!!)

Sunday, December 20, 2015

2015 Holiday Luncheon

Team Holiday Luncheon-Merry Christmas!

2015 has had many challenges for me! But all with wonderful results in the end!
Thanks to a start on a new venture to a healthy lifestyle and using Young Living Essential Oils!
Above are a few of my new team members. As we explore the possibilities together we anticipate 2016 to be an AMAZING year!

If you are interested in learning more about Young Living go HERE.